Setting up a hardware wallet is one of the smartest moves you can make to secure digital assets. This guide walks you through unboxing, initializing your device, protecting the recovery phrase, installing the ledger live wallet, and adding accounts. Whether you’re brand-new to self-custody or refreshing your security routine, the steps below will help you start safely and confidently.
Important: Only use the accessories included with your device. If anything looks tampered with, stop and contact support before proceeding.
Your PIN is required each time you unlock the wallet. Choose something memorable yet hard to guess, and never share it with anyone.
The device will display 24 words in order. Carefully write them down—twice if possible—and verify them when prompted. This phrase is the ultimate backup to your funds.
Pro tip: Treat the recovery phrase like the keys to your home and bank account combined. Anyone with it can move your assets.
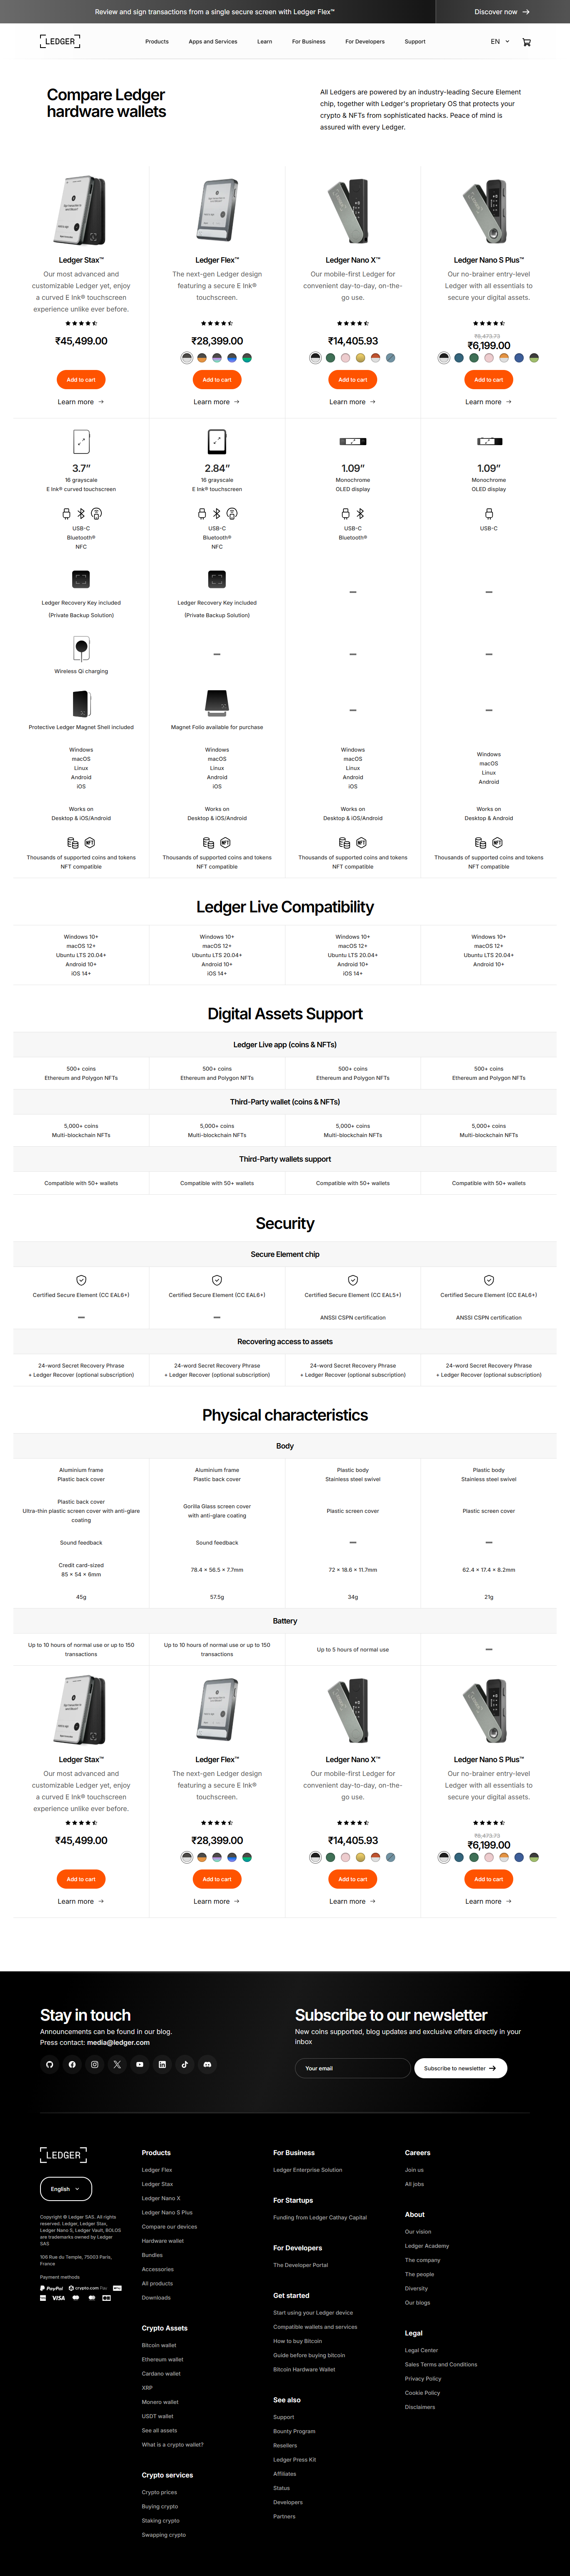
On your computer or mobile device, download and install the ledger live wallet. This companion app lets you manage accounts, view balances, and approve transactions while your private keys remain safely on the hardware device. During first launch, choose “Set up a new device” or “Connect an existing device,” then follow on-screen checks to ensure the device is genuine.
In the ledger live wallet, go to the “Accounts” or “Add account” section. Select the cryptocurrency you want to manage (e.g., Bitcoin or Ethereum). The app may prompt you to install the relevant coin app on your Ledger device—approve the installation on the device screen. Once added, you’ll see your account appear with a receive address you can use safely.
Before moving significant funds, send a small test amount to your new receive address. Always verify the address on the Ledger device display and confirm it matches the one shown in the ledger live wallet. After the test confirms, you can transfer larger amounts with confidence.
You’ve initialized your device, protected the recovery phrase, installed the ledger live wallet, and added accounts—great work. With these fundamentals in place, you’re ready to manage crypto with hardware-level security and a smooth software experience. Keep your backups safe, stay vigilant against phishing, and verify every on-device prompt. That consistent routine is what keeps your assets under your control, today and long into the future.